Why You'll Love It
- - Uses sourdough discard, no waste
- - Soft, buttery crumb with a crisp edge
- - Easy to pull apart, perfect for sharing
- - Gentle garlic flavor that doesn’t overwhelm
*"The crumb is so light and the garlic flavor just lingers—my family can’t get enough!"*
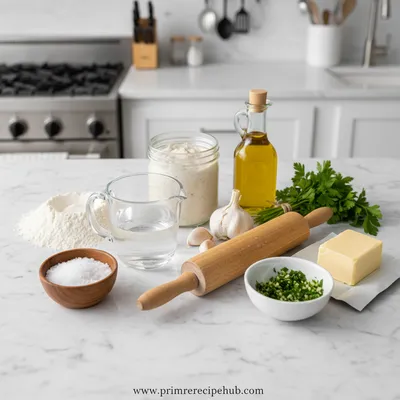
Essential Ingredient Guide
- Sourdough discard: Provides a mild tang and helps the dough rise without feeding a new starter.
- All‑purpose flour: Creates a tender crumb; sift for a lighter texture.
- Unsalted butter: Adds richness and helps achieve that golden, crisp crust.
- Garlic cloves: Minced finely to distribute flavor evenly throughout the loaf.
- Lemon zest: A touch of citrus brightens the garlicky depth.
- Parmesan cheese: Optional, for a salty, umami finish on the surface.
Complete Cooking Process
-
Ingredient Readiness:
Measure flour, soften butter, and let the discard come to room temperature before mixing.
-
Flavor Development:
Combine butter, garlic, and zest, then fold into the dough to let the aroma start blooming.
-
Texture Control:
Knead gently until smooth; avoid over‑working to keep the crumb airy.
-
Finishing Touches:
Brush the loaf with melted butter, sprinkle cheese, and let it rest briefly before baking.
-
Serving Timing:
Serve warm, straight from the oven, while the crust is still crackling.
- Let the dough rest a second time for extra fluffiness
- Use fresh garlic for a brighter flavor
- Brush with butter infused with herbs for added aroma
- Slice just before serving to keep edges crisp
Pro Tips
I’ve found that a short second rise, even fifteen minutes, makes the pull‑apart sections separate with ease. Also, a tiny drizzle of olive oil after baking adds a glossy finish that catches the light and the eye. It’s those little moments—pausing, smelling, tasting—that turn a recipe into a memory.
The essence of the dish:
A fun fact or historical angle:
Flavor or sensory focus:
You Must Know
- Do not over‑mix; gentle kneading preserves air pockets
- A hot oven (425°F) gives the perfect crust
- Rest the dough after shaping for a uniform rise
Frequently Asked Questions
→ Can I use whole‑wheat flour?
Yes, replace up to half of the all‑purpose flour with whole‑wheat for a nuttier crumb, but keep the overall hydration the same.
→ How long can I keep the discard?
Discard can be stored in the refrigerator for up to a week; just give it a quick stir before using.
→ Do I need to proof the dough twice?
A single rise works, but a short second proof adds extra fluffiness and makes the pull‑apart texture lighter.
→ Can I freeze the baked loaf?
Absolutely—wrap tightly and freeze for up to two months; reheat in the oven to revive the crust.
→ What if I don’t have a sourdough starter?
You can substitute with an equal amount of plain yogurt or kefir; the flavor will be milder but still delicious.
→ Is this recipe gluten‑free?
Not with regular flour. Use a gluten‑free all‑purpose blend and adjust liquid slightly for best results.
Chef's Tips
If the dough feels too sticky, add a tablespoon of flour at a time.,For extra crispness, place a shallow pan of water on the lower rack while baking.,Feel free to sprinkle additional herbs on top just before serving.
Nutrition Facts
per serving
280
Calories
8g
Protein
35g
Carbs
12g
Fat
Taste Profile
Savory with a hint of buttery richness
Ingredient Substitutions
Don't have an ingredient? Try these alternatives
Provides moisture and mild tang; adjust flour slightly.
Adds a cheesy flavor while keeping it dairy‑free
Recipe Variations
Try these delicious twists on the original
Spicy Version
Add 1/2 tsp red pepper flakes to the garlic butter for a gentle heat.
Mediterranean Style
Stir in chopped olives and sun‑dried tomatoes into the dough before shaping.
Common Mistakes to Avoid
Learn from others' mistakes for perfect results
- Over‑kneading, which makes the crumb dense
- Skipping the butter‑garlic brush, resulting in a dry crust
- Baking at too low a temperature, leading to soggy edges
Meal Prep & Storage
Make Ahead Tips
You can mix the dough and let it rise up to 24 hours in the refrigerator; bring to room temperature before shaping and baking.
Leftover Ideas
Reheat gently in a skillet over low heat, covered, to revive the crust without drying out the interior.
Perfect Pairings
Serve this with...
Cooking Timeline
Gather and measure all ingredients; bring discard to room temperature.
Mix dough and knead until smooth.
First rise: let dough double in size.
Shape, fold, and create pull‑apart strips; rest briefly.
Bake, then cool slightly before pulling apart.
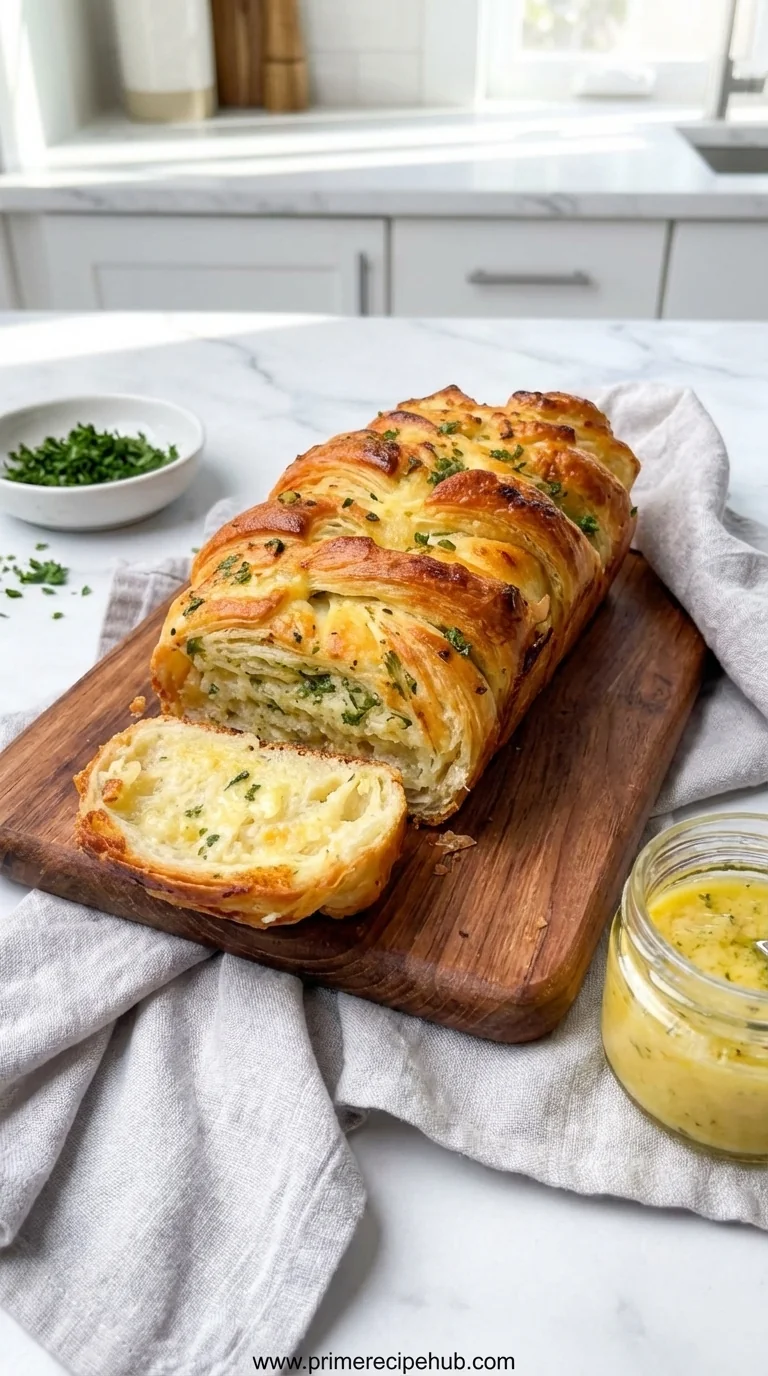
Sourdough Discard Pull-Apart Garlic Bread
A warm, fluffy pull‑apart loaf that lets you use up sourdough discard while basking in buttery garlic aromas. Ideal for a cozy morning or a simple side to a hearty soup.
Timing
Prep Time
20 Minutes
Cook Time
25 Minutes
Total Time
45 Minutes
Recipe Details
Ingredients
Dough
- 01 1 cup sourdough discard (unfed)
- 02 2 1/2 cups all‑purpose flour
- 03 1 tsp instant yeast
- 04 1 tsp salt
- 05 1 tbsp olive oil
- 06 3/4 cup warm water
Garlic Butter Topping
- 01 4 tbsp unsalted butter, melted
- 02 3 cloves garlic, minced
- 03 1 tsp lemon zest
- 04 2 tbsp fresh parsley, chopped
- 05 1/4 cup grated Parmesan (optional)
Instructions
In a large bowl combine the sourdough discard, flour, instant yeast, and salt; stir until just combined.
Add olive oil and warm water, then knead gently for about 5 minutes until the dough is smooth and slightly tacky.
Cover the bowl with a damp cloth and let the dough rise in a warm spot for 45‑60 minutes, until doubled.
While the dough rises, mix melted butter, minced garlic, lemon zest, and parsley in a small bowl.
After the first rise, turn the dough onto a floured surface, pat into a rectangle, and brush generously with the garlic butter mixture.
Fold the dough in thirds, then cut into 8 equal strips; stack the strips and gently pull apart to create a pull‑apart lattice.
Place the loaf on a parchment‑lined baking sheet, brush with any remaining butter, sprinkle Parmesan if using, and let rest for 15 minutes.
Bake in a pre‑heated oven at 425°F (220°C) for 20‑25 minutes, until golden brown and fragrant.
Notes & Tips
- 1 If the dough feels too sticky, add a tablespoon of flour at a time.
- 2 For extra crispness, place a shallow pan of water on the lower rack while baking.
- 3 Feel free to sprinkle additional herbs on top just before serving.
Tools You'll Need
-
Large mixing bowl
-
Stand mixer or sturdy spoon
-
Baking sheet
-
Parchment paper
-
Pastry brush
-
Sharp knife
Must-Know Tips
- Don't over‑knead, it removes air needed for fluffiness
- Let the dough rise fully for the best pull‑apart texture
- Taste the butter mixture before spreading; adjust garlic to your liking
Professional Secrets
- Room temperature butter blends evenly with dough
- High oven heat creates that satisfying crackle on the crust
- Resting the shaped loaf reduces shrinkage during baking

Recipe by
Sophia BennettSophia Bennett represents the artistic heart of sweet baking with her elegant cakes, delicate pastries, and celebration desserts. She enjoys crafting ...
Get Delicious Recipes Weekly
Join 25,000+ home cooks getting our best recipes straight to their inbox.
Free forever • No spam • Unsubscribe anytime