Why You'll Love It
- - Bite‑size convenience for parties
- - Velvety crumb that stays moist
- - Easy to customize with sprinkles or drizzles
- - No need for fancy equipment
*"These cake pops are just the right mix of soft cake and chocolate coating—pure joy!"*
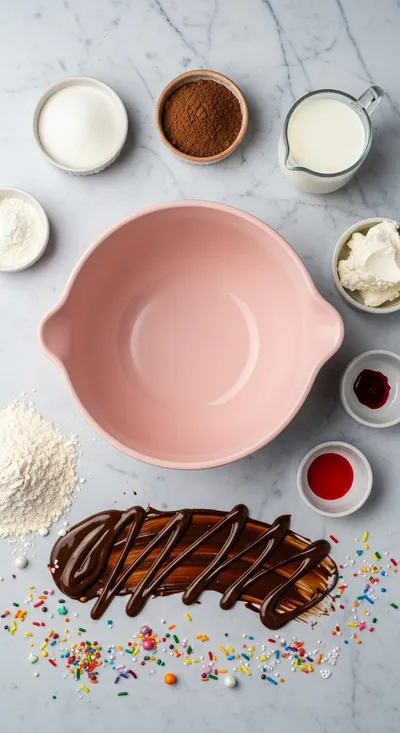
Essential Ingredient Guide
- Red velvet cake crumbs: Use day‑old cake for easier shaping; it holds together better.
- Cream cheese frosting: Full‑fat cream cheese gives a silky interior and balances the cocoa.
- Chocolate coating: A good meltable chocolate creates a glossy shell and a slight snap.
- Sprinkles: Add color and a light crunch; choose themed shapes for special events.
- Vanilla extract: A dash amplifies the sweet aroma without overpowering the beet note.
- Red food coloring: A little goes a long way; blend well for an even, deep hue.
Complete Cooking Process
-
Ingredient Readiness:
Crumble the cake, chill the frosting, and melt the chocolate in a heat‑proof bowl.
-
Flavor Development:
Mix the crumbs with frosting, letting the beet‑sweetness meld with the cream cheese.
-
Texture Control:
Roll into spheres, chill again so they hold their shape before coating.
-
Finishing Touches:
Dip each pop into chocolate, then sprinkle before the glaze sets.
-
Serving Timing:
Serve at room temperature for the softest bite; the coating will stay glossy.
- Use a candy thermometer for chocolate; 115°F is ideal for dipping.
- Pat pops dry with a paper towel before coating to avoid water spots.
- Cool coated pops on parchment; they set faster in a refrigerator.
- Roll extra crumbs in chocolate before dipping for a textured look.
Pro Tips
Well, these little tips keep the process smooth and the results look as polished as you’d expect from a bakery. I mean, even if a pop slips, it’s still delicious, so don’t stress.
The essence of the dish:
A fun fact or historical angle:
Flavor or sensory focus:
You Must Know
- Work quickly once chocolate is melted
- Keep pops chilled until serving
- Even coating prevents drips
Frequently Asked Questions
→ Can I make these ahead of time?
Yes, prepare the balls and freeze them; dip and decorate just before serving.
→ What if I don’t have red food coloring?
A splash of beet juice or red cocoa powder will give a natural hue.
→ How long do they keep?
Stored in an airtight container in the fridge for up to three days.
→ Can I use white chocolate?
Absolutely, though the contrast will be softer; still delicious.
→ Do they freeze well?
Yes, freeze the uncoated balls, then dip after thawing for best texture.
→ Are there gluten‑free options?
Swap regular cake for a gluten‑free red velvet recipe; see lemon velvet cake lemon for inspiration.
Chef's Tips
If the mixture feels dry, add a tablespoon of milk.,For extra shine, brush the coated pops with a thin layer of melted butter.,You can freeze the coated pops for up to a month; let them sit at room temperature before serving.
Nutrition Facts
per serving
380
Calories
5g
Protein
38g
Carbs
22g
Fat
Taste Profile
Rich chocolate with a buttery, sweet crumb.
Ingredient Substitutions
Don't have an ingredient? Try these alternatives
Will change the color but keep the texture.
Creates a softer visual contrast.
Recipe Variations
Try these delicious twists on the original
Spicy Version
Add a pinch of cayenne to the chocolate coating for a subtle heat.
Mediterranean Style
Swap sprinkles for crushed pistachios and drizzle with honey.
Common Mistakes to Avoid
Learn from others' mistakes for perfect results
- Over‑mixing the crumb mixture, resulting in a dense pop.
- Dipping balls when chocolate is too hot, causing a dull finish.
- Skipping the chill step, leading to crumbling.
Meal Prep & Storage
Make Ahead Tips
You can crumble and mix the cake with frosting up to 24 hours ahead; keep the mixture covered and chilled.
Leftover Ideas
Reheat gently in a microwave for 10 seconds before serving to soften the interior.
Perfect Pairings
Serve this with...
Cooking Timeline
Crumble cake and blend with frosting, color, and vanilla.
Shape into balls and chill.
Melt chocolate with butter; prepare sticks.
Dip, sprinkle, and set pops to harden.
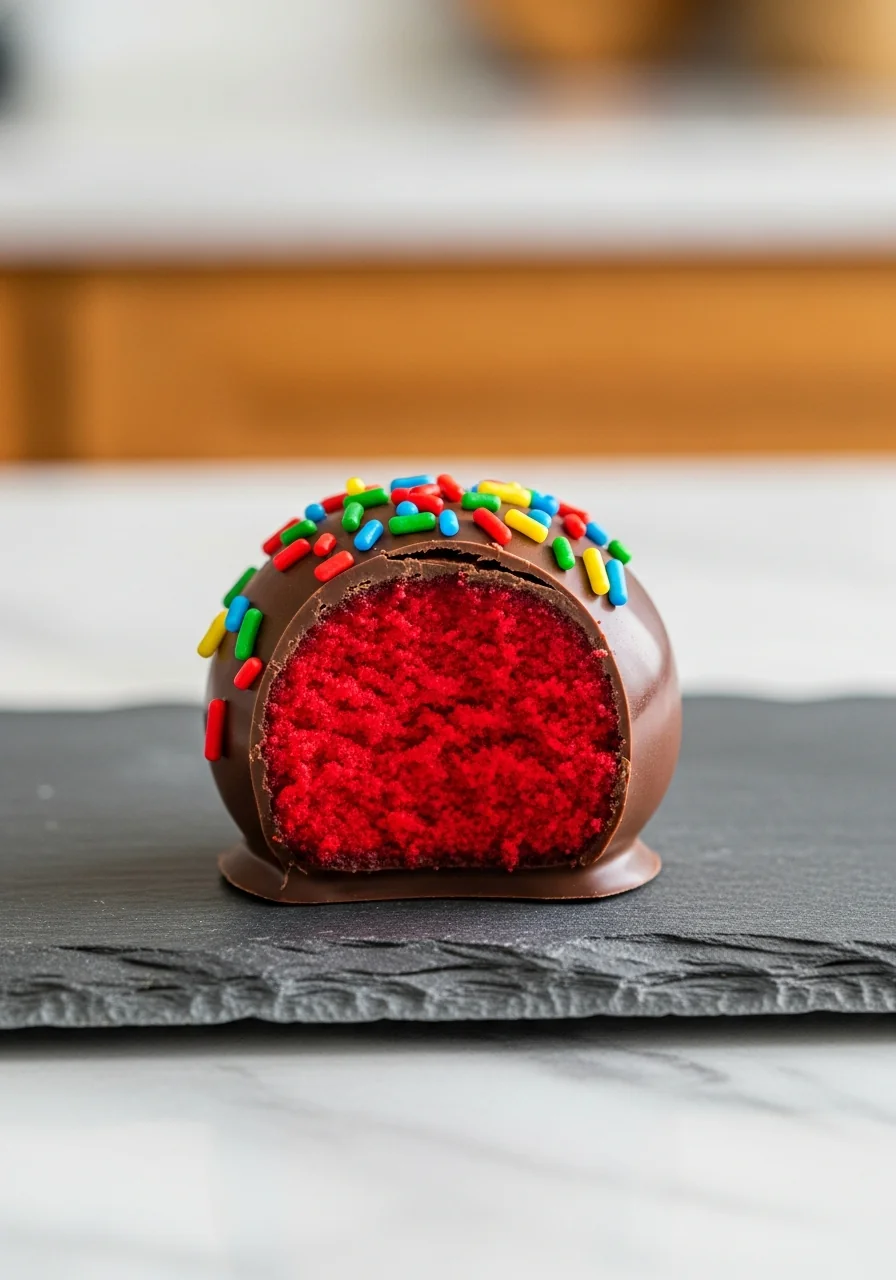
Red Velvet Cake Pops
Delicious red velvet cake pops are perfect bite-sized treats, moist cake coated in chocolate and topped with sprinkles. They bring a pop of color and comfort to any gathering.
Timing
Prep Time
20 Minutes
Cook Time
10 Minutes
Total Time
30 Minutes
Recipe Details
Ingredients
Main Ingredients
- 01 2 cups crumbled red velvet cake (day‑old)
- 02 1 cup cream cheese frosting
- 03 12 ounces semi‑sweet chocolate chips
- 04 2 tbsp unsalted butter
- 05 6 tbsp red food coloring
- 06 1 tsp vanilla extract
- 07 Sprinkles, as desired
- 08 12 lollipop sticks
Instructions
In a large bowl, combine the cake crumbs with the cream cheese frosting, vanilla, and red food coloring; mix until the mixture holds together when pressed.
Roll the mixture into 1‑inch balls, place on a parchment sheet, and chill for at least 15 minutes.
Melt the chocolate with butter over a double boiler, stirring until smooth; keep temperature around 115°F.
Insert a stick into each chilled ball, dip slowly into the chocolate, letting excess drip off, then immediately roll in sprinkles.
Set the coated pops upright in a Styrofoam block or cup; let the coating set at room temperature or refrigerate briefly.
Notes & Tips
- 1 If the mixture feels dry, add a tablespoon of milk.
- 2 For extra shine, brush the coated pops with a thin layer of melted butter.
- 3 You can freeze the coated pops for up to a month; let them sit at room temperature before serving.
Tools You'll Need
-
Large mixing bowl
-
Food processor or whisk
-
Double boiler or microwave safe bowl
-
Parchment paper
-
Cooler or refrigerator
-
Lollipop sticks
Must-Know Tips
- Don’t over‑mix the crumbs; you want a pliable texture.
- Keep chocolate smooth; avoid steam in the bowl.
- Work quickly after dipping to maintain a glossy finish.
Professional Secrets
- Room temperature ingredients ensure even coating.
- A thin butter layer in chocolate adds gloss.
- Cooling the balls before dipping prevents cracks.

Recipe by
Sophia BennettSophia Bennett represents the artistic heart of sweet baking with her elegant cakes, delicate pastries, and celebration desserts. She enjoys crafting ...
Get Delicious Recipes Weekly
Join 25,000+ home cooks getting our best recipes straight to their inbox.
Free forever • No spam • Unsubscribe anytime