Why You'll Love It
- - Bite‑size convenience for any occasion
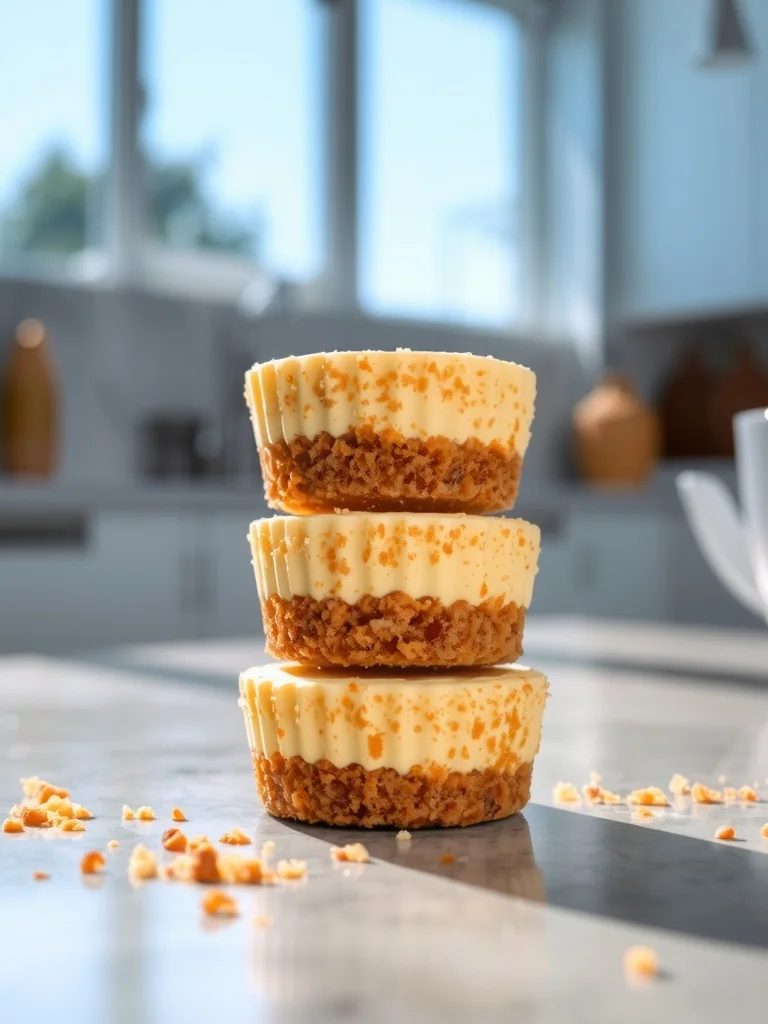
- - Creamy texture with a buttery crust
- - Easy to customize with toppings
- - Makes entertaining effortless
“These mini cheesecakes are pure joy—creamy, light, and just the right amount of sweet!”
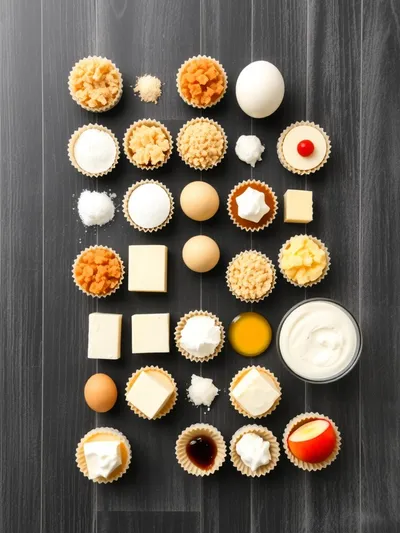
Essential Ingredient Guide
- Cream Cheese: Choose full‑fat cream cheese for richness; let it soften to room temperature for a smooth batter
- Graham Cracker Crumbs: Freshly crushed for a uniform base; a touch of melted butter binds the crust
- Lemon Zest: Adds brightness; be sure to zest only the yellow part for pure citrus aroma
- Vanilla Extract: A splash deepens the flavor; use pure vanilla for the best aroma
- Sour Cream: Provides subtle tang and a silky mouthfeel
- Granulated Sugar: Balances the tang of cream cheese; dissolve fully to avoid grainy texture
Complete Cooking Process
-
Ingredient Readiness:
Soften the cream cheese, melt butter, and pre‑measure all dry ingredients before you begin.
-
Flavor Development:
Blend the cream cheese with sugar, vanilla, and lemon zest until light and airy.
-
Texture Control:
Press the crumb mixture gently into each tin to form a stable crust without over‑packing.
-
Finishing Touches:
Top each cheesecake with a dollop of fresh fruit or a drizzle of caramel just before chilling.
-
Serving Timing:
Allow the mini cheesecakes to chill for at least two hours; they hold their shape beautifully when served.
- Use a water bath for an ultra‑smooth surface
- Don’t over‑mix the batter; air bubbles can cause cracks
- Run a thin knife around the edge while still warm for a clean release
- Freeze leftovers for up to a month; thaw gently
Pro Tips
Well, when you take a moment to let the cheesecakes rest, you’ll notice the flavor settling together, like a quiet conversation. I find that a little patience gives the crust a firmer bite while the interior stays luxuriously creamy. So, let them sit, and then savor each little slice as if it were a small, sweet memory.
The essence of the dish:
A fun fact or historical angle:
Flavor or sensory focus:
You Must Know
- Do not over‑bake; the center should still wobble slightly
- Cool completely before chilling to avoid condensation
- Serve chilled for the best texture
Frequently Asked Questions
→ Can I make these ahead of time?
Yes, store the mini cheesecakes in an airtight container in the refrigerator for up to three days.
→ What if I don’t have graham crackers?
You can substitute with digestive biscuits or vanilla wafers, finely crushed.
→ How do I prevent cracks on the surface?
Avoid over‑mixing and bake at a gentle temperature; a water bath helps keep the surface smooth.
→ Can I freeze the mini cheesecakes?
Absolutely—wrap each tin tightly and freeze for up to a month; thaw in the fridge before serving.
→ What toppings work best?
Fresh berries, a drizzle of caramel, or a dusting of cocoa powder add lovely contrast.
→ Is there a gluten‑free version?
Use almond flour or gluten‑free oat flour for the crust, and ensure all additives are certified gluten‑free.
Chef's Tips
The batter should be smooth but not over‑mixed, or it may crack during baking.,If you prefer a firmer texture, increase the baking time by a minute or two.,Feel free to experiment with flavored extracts like almond or orange for a twist.
Nutrition Facts
per serving
250
Calories
5g
Protein
20g
Carbs
18g
Fat
Taste Profile
Creamy, sweet, with a bright citrus hint
Ingredient Substitutions
Don't have an ingredient? Try these alternatives
Provides a slightly lighter texture; may need a bit more sugar
Maintains richness; blend well to avoid grainy texture
Recipe Variations
Try these delicious twists on the original
Spicy Version
Add a pinch of cayenne and drizzle with honey for a sweet‑heat twist.
Mediterranean Style
Fold in toasted pistachios and a drizzle of honey, then top with a sprinkle of sea salt.
Common Mistakes to Avoid
Learn from others' mistakes for perfect results
- Over‑mixing the batter, leading to cracks
- Baking at too high a temperature, causing a dry top
- Skipping the cooling period, resulting in soggy crust
Meal Prep & Storage
Make Ahead Tips
You can prepare the crust and filling a day ahead, then refrigerate the assembled mini cheesecakes; bake just before serving.
Leftover Ideas
Reheat gently in a skillet over low heat with a splash of milk to restore creaminess.
Perfect Pairings
Serve this with...
Cooking Timeline
Preheat oven and prepare crust mixture.
Press crust into ramekins and set aside.
Blend cream cheese, sugar, vanilla, lemon zest, sour cream, and eggs.
Bake, cool in oven, then refrigerate.
Add toppings and serve.
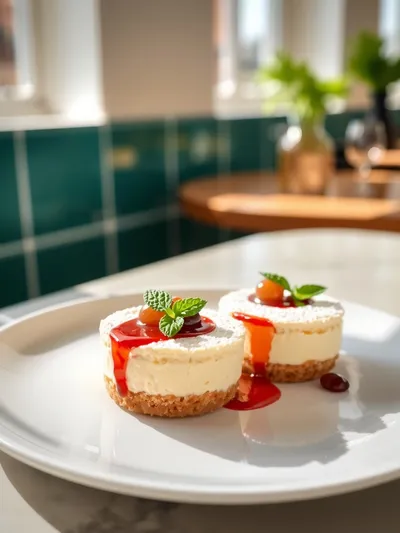
Mini Cheesecakes – Easy Bite‑Size Desserts
These bite‑size mini cheesecakes are creamy, rich, and just the right size for a sweet bite any time of day. Perfect for parties, potlucks, or a quiet moment at home.
Timing
Prep Time
20 Minutes
Cook Time
15 Minutes
Total Time
35 Minutes
Recipe Details
Ingredients
Crust
- 01 1 cup graham cracker crumbs
- 02 2 tbsp granulated sugar
- 03 3 tbsp unsalted butter, melted
Filling
- 01 12 oz (340 g) full‑fat cream cheese, softened
- 02 1/3 cup granulated sugar
- 03 1 tsp vanilla extract
- 04 1 tsp lemon zest
- 05 1/2 cup sour cream
- 06 2 large eggs
Topping (optional)
- 01 Fresh berries
- 02 Caramel drizzle
- 03 Powdered sugar for dusting
Instructions
Preheat the oven to 325°F (160°C). In a bowl, combine graham cracker crumbs, sugar, and melted butter; stir until the mixture resembles wet sand.
Press the crumb mixture evenly into the bottom of 12‑ounce ramekins, creating a firm base. Place the ramekins on a baking sheet.
In a large mixing bowl, beat the softened cream cheese until smooth. Add sugar, vanilla, and lemon zest; continue beating until fluffy.
Fold in sour cream, then add eggs one at a time, mixing just until incorporated. Pour the batter over the crusts, filling each ramekin about three‑quarters full.
Bake for 12‑15 minutes, until the edges are set but the center still has a slight wobble. Turn off the oven, leave the door ajar, and let the cheesecakes cool for 30 minutes.
Refrigerate the mini cheesecakes for at least 2 hours. Top with fresh berries, a drizzle of caramel, or a dusting of powdered sugar before serving.
Notes & Tips
- 1 The batter should be smooth but not over‑mixed, or it may crack during baking.
- 2 If you prefer a firmer texture, increase the baking time by a minute or two.
- 3 Feel free to experiment with flavored extracts like almond or orange for a twist.
Tools You'll Need
-
12‑ounce ramekins
-
Mixing bowls
-
Electric hand mixer
-
Measuring cups and spoons
-
Spatula
-
Baking sheet
Must-Know Tips
- Don’t over‑mix the filling; gentle folding keeps it creamy
- Cool the crust slightly before adding the batter to avoid melting the butter
- Run a thin knife around the edge while still warm for a clean release
Professional Secrets
- Room temperature ingredients ensure even mixing
- A water bath creates a gentle, even heat for a smooth top
- Letting the cheesecakes rest in the oven prevents sudden temperature changes

Recipe by
Sophia BennettSophia Bennett represents the artistic heart of sweet baking with her elegant cakes, delicate pastries, and celebration desserts. She enjoys crafting ...
Get Delicious Recipes Weekly
Join 25,000+ home cooks getting our best recipes straight to their inbox.
Free forever • No spam • Unsubscribe anytime