Why You'll Love It
- - The incredible height and thickness that feels like a decadent dessert
- - The perfect balance of salty walnuts and sweet semi-sweet chocolate
- - A center that stays gooey and soft even after the cookies cool
- - The satisfyingly crunchy golden-brown exterior
_"These are absolutely massive! The chocolate is so melty and the walnuts give it such a lovely crunch. Just like the bakery!"_
Essential Ingredient Guide
- Cold Unsalted Butter: Keep it chilled! Cold butter is the secret to preventing the cookies from spreading too much, ensuring that signature height.
- Walnut Halves: Coarsely chop them so you get big, chunky pieces. It adds a rustic feel and a deeper nutty flavor.
- Semi-Sweet Chocolate Chips: Use high-quality chips or chunks. The larger the chunk, the more wonderful the pools of melted chocolate will be.
- Cornstarch: This little bit of powder helps keep the cookies soft and prevents them from becoming too tough or dry.
- Brown Sugar: Use a packed dark brown sugar for a deeper, molasses-like richness that complements the walnuts.
- Vanilla Extract: A good splash of pure extract ties all the flavors together and adds a warm, comforting aroma.
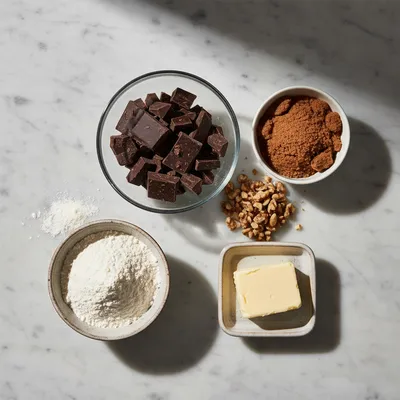
Complete Cooking Process
-
Ingredient Readiness:
Start with cold butter and room temperature eggs. The butter should be firm but not frozen, which is key to the structure. Your walnuts should be roughly chopped so they don't disappear into the dough.
-
Flavor Development:
The magic happens when the brown sugar and butter are creamed together just enough to incorporate, but not so much that they become airy. This keeps the cookie dense and rich.
-
Texture Control:
The most critical moment is the mixing of the flour. Do not overmix! Once the streaks of flour disappear, stop. Overmixing leads to a bread-like texture instead of a tender crumb.
-
Finishing Touches:
After baking, let the cookies sit on the hot pan for at least 10 to 15 minutes. They are fragile when hot and need this time to set their structure.
-
Serving Timing:
These are best served slightly warm, or at room temperature for a more fudgy, chewy experience.
- Chill your dough balls for at least 30 minutes if you have time
- Use a large scoop to keep the shapes uniform and towering
- Don't flatten the dough balls; leave them as rustic mounds
- Bake at a higher temperature to sear the outside quickly
Pro Tips
I remember one time I got impatient and put the dough in the oven without chilling it. Oops. The cookies didn't collapse completely, but they definitely weren't as tall as I wanted. So, yeah, patience really is the most important ingredient here. Also, look, don't be tempted to keep baking them until they look 'done' all over. If the edges are golden, take them out. The middle should still look a little underbaked—that's where the magic gooeyness lives.
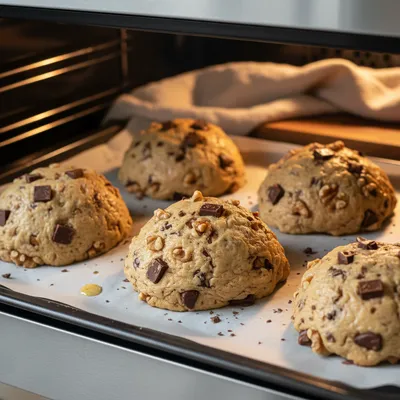
The essence of the dish:
A fun fact or historical angle:
Flavor or sensory focus:
You Must Know
- Cold butter is non-negotiable for the height
- Measuring flour by weight is safer than by cups
- Do not overbake or you'll lose the gooey center
Frequently Asked Questions
→ Why are my cookies spreading too much?
This usually happens if the butter was too soft or if the dough wasn't chilled. Make sure your butter is cold from the fridge and avoid over-creaming.
→ Can I use different nuts?
Absolutely. Pecans are a wonderful substitute for walnuts, providing a slightly sweeter, butterier flavor.
→ Do I really need cornstarch?
Yes, the cornstarch helps create that specific soft, tender interior that defines this style of cookie.
→ How do I store these so they stay soft?
Store them in an airtight container. You can even put a slice of white bread in the container to keep them moist.
→ Can I freeze the dough?
Yes! Scoop the dough into balls and freeze them on a tray. Once frozen, move them to a bag. Bake straight from frozen, adding 2-3 minutes to the time.
→ Why does the middle look raw?
That's the intention! These cookies are meant to be slightly underbaked in the center to maintain a gooey, fudge-like texture.
Chef's Tips
If your kitchen is very warm, pop the scooped dough balls in the fridge for 30 minutes before baking to ensure they don't flatten.,For a deeper flavor, you can toast the walnuts in a pan for 3 minutes before adding them to the dough.,If you like a bit of salt, sprinkle a tiny pinch of flaky sea salt on top immediately after they come out of the oven.
Nutrition Facts
per serving
580
Calories
9g
Protein
48g
Carbs
32g
Fat
Taste Profile
A rich, buttery sweetness balanced by the earthy, toasted flavor of walnuts.
Ingredient Substitutions
Don't have an ingredient? Try these alternatives
Pecans provide a slightly sweeter taste.
Dark chocolate makes the cookie less sweet and more intense.
Recipe Variations
Try these delicious twists on the original
Double Chocolate Version
Add 1/2 cup of cocoa powder to the flour mix for a deep chocolate base.
Maple Walnut Twist
Substitute some brown sugar with maple syrup for a woody, autumn flavor, similar to maple walnut shortbread.
Common Mistakes to Avoid
Learn from others' mistakes for perfect results
- Using melted butter instead of cold cubed butter, which makes the cookies flat.
- Overmixing the flour, which makes the cookies tough instead of tender.
- Baking until the center is firm, which removes the signature gooeyness.
Meal Prep & Storage
Make Ahead Tips
You can prepare the dough and freeze the shaped balls. Just bake them directly from the freezer, adding a few extra minutes to the timer.
Leftover Ideas
Reheat in a toaster oven for 2 minutes to bring back that melty, gooey center.
Perfect Pairings
Serve this with...
Cooking Timeline
Cream cold butter and sugars, then mix in eggs and vanilla.
Combine dry ingredients and fold into the wet mix.
Fold in chocolate and walnuts, then scoop into large mounds.
Bake at 400°F for 12-15 minutes and let rest on the pan.
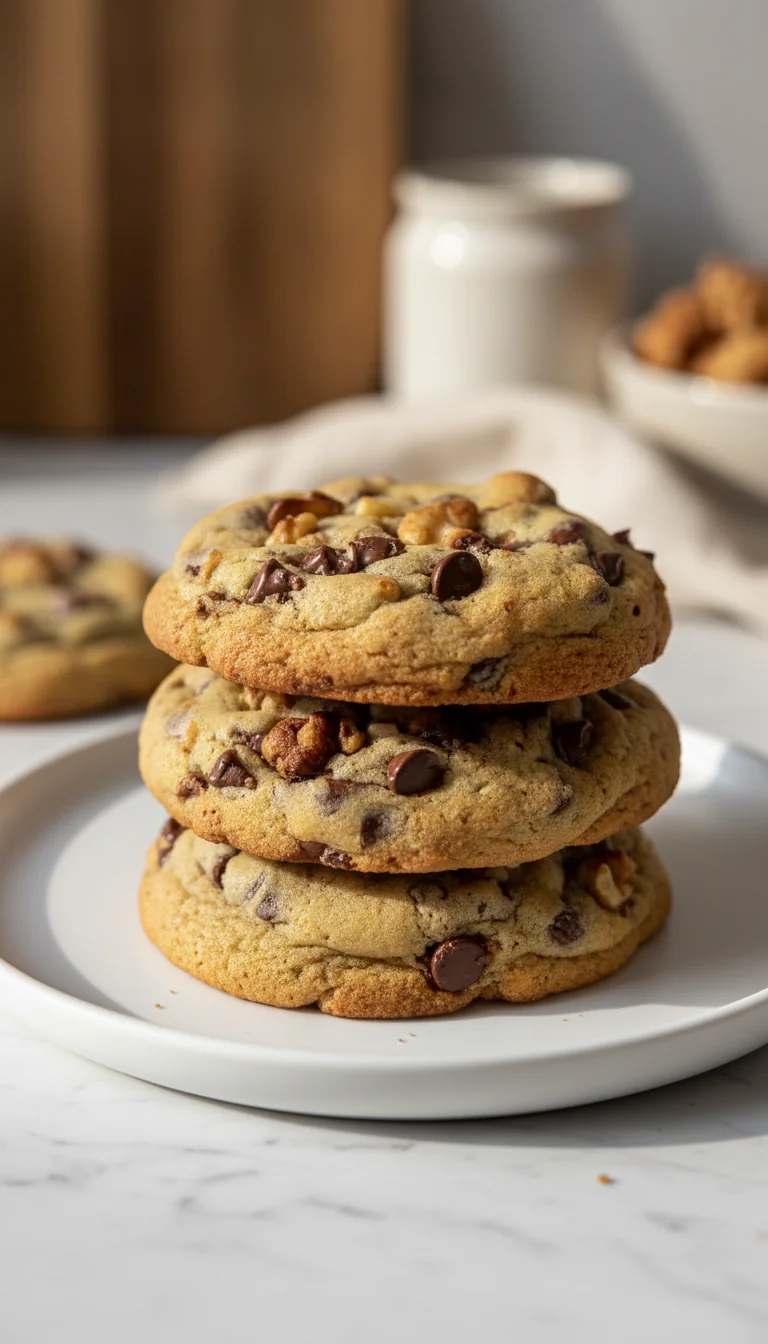
Levain Chocolate Walnut Cookie Recipe
Thick, mountain-like cookies with melty chocolate and toasted walnuts, capturing that famous bakery-style gooey center.
Timing
Prep Time
20 Minutes
Cook Time
15 Minutes
Total Time
35 Minutes
Recipe Details
Ingredients
The Dough Base
- 01 1 cup cold unsalted butter, cubed
- 02 3/4 cup packed dark brown sugar
- 03 1/2 cup granulated sugar
- 04 2 large eggs, cold
- 05 1 tsp vanilla extract
- 06 2 cups all-purpose flour
- 07 1 tsp cornstarch
- 08 1/2 tsp baking soda
- 09 1/2 tsp salt
The Mix-Ins
- 01 1.5 cups semi-sweet chocolate chips or chunks
- 02 1 cup coarsely chopped walnuts
Instructions
Preheat your oven to 400°F (200°C) and line a heavy baking sheet with parchment paper. Now, in a large bowl, cream together the cold cubed butter and both sugars. You don't want it fluffy; just combined enough that the butter is broken down.
Add in the cold eggs one at a time, followed by the vanilla extract. Mix on low speed just until the eggs are incorporated. Dang, it's tempting to overmix here, but resist it!
In a separate bowl, whisk together the flour, cornstarch, baking soda, and salt. Slowly add the dry ingredients to the wet mixture. Stir with a wooden spoon or spatula until barely combined.
Gently fold in the chocolate chips and chopped walnuts. Try not to smash the chips; you want those beautiful pockets of chocolate.
Scoop about 6 ounces of dough (roughly 1/2 cup) and form it into a tall, rough ball. Don't smooth the top; those craggy edges get wonderfully crisp.
Bake for 12-15 minutes. The edges should be golden brown, but the center should still look slightly soft and pale.
Let the cookies rest on the pan for 15 minutes before moving them to a wire rack. This is the hardest part, but it's necessary for the center to set.
Notes & Tips
- 1 If your kitchen is very warm, pop the scooped dough balls in the fridge for 30 minutes before baking to ensure they don't flatten.
- 2 For a deeper flavor, you can toast the walnuts in a pan for 3 minutes before adding them to the dough.
- 3 If you like a bit of salt, sprinkle a tiny pinch of flaky sea salt on top immediately after they come out of the oven.
Tools You'll Need
-
Electric hand mixer or stand mixer
-
Large mixing bowls
-
Baking sheet
-
Parchment paper
-
Measuring cups and spoons
-
Rubber spatula
-
Ice cream scoop (large)
Must-Know Tips
- Keep butter cold: Room temperature butter will cause the cookies to spread into pancakes.
- Don't overbake: A pale center is a sign of success for this specific style.
- Rough shapes: Avoid making perfectly smooth balls; rustic mounds bake better.
Professional Secrets
- High Heat: Baking at 400°F sears the outside of the cookie quickly, locking in the shape before the center melts.
- Cornstarch Addition: This modifies the protein in the flour, resulting in a softer, more 'tender' bite.
- The Rest Period: Allowing the cookies to cool on the pan uses residual heat to finish cooking the center gently.

Recipe by
Sophia BennettSophia Bennett represents the artistic heart of sweet baking with her elegant cakes, delicate pastries, and celebration desserts. She enjoys crafting ...
Get Delicious Recipes Weekly
Join 25,000+ home cooks getting our best recipes straight to their inbox.
Free forever • No spam • Unsubscribe anytime