Why You'll Love It
- - A satisfyingly crunchy exterior
- - Juicy, flavorful meat inside
- - Simple pantry ingredients
- - Versatile for dinners or celebrations
*"The crust is unbelievably crisp, and the meat stays so tender—my family can’t get enough!"*
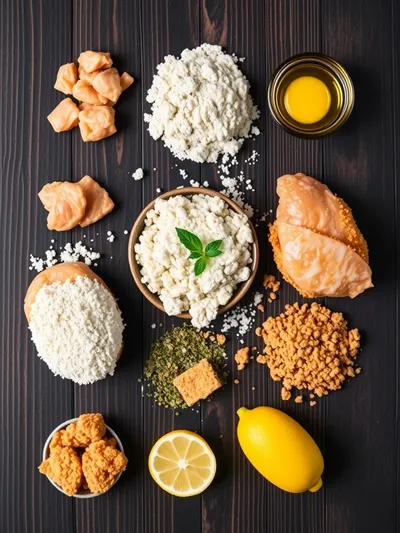
Essential Ingredient Guide
- Chicken thighs: Thighs stay moist; look for skinless, boneless pieces and pat dry before coating.
- All‑purpose flour: Provides the base for the crust; sift for an even texture.
- Buttermilk: Tenderizes the meat and adds a subtle tang.
- Paprika and garlic powder: Adds depth and a gentle warmth to the seasoning.
- Lemon juice: Brightens the flavor and balances the richness.
- Honey: A hint of sweetness helps the crust caramelize.
Complete Cooking Process
-
Ingredient Readiness:
Trim any excess fat, pat the chicken dry, and whisk the buttermilk with a splash of lemon.
-
Flavor Development:
Season the flour mixture, then dredge the chicken, allowing the coating to cling before frying.
-
Texture Control:
Fry in moderately hot oil, turning once, until the crust turns a deep golden brown.
-
Finishing Touches:
Drain on a rack, then drizzle with a little honey for a glossy finish.
-
Serving Timing:
Serve immediately while the crust is still crisp, with a side of coleslaw or mashed potatoes.
- Let the coated chicken rest 10 minutes before frying – helps the crust adhere.
- Use a thermometer; aim for 350°F oil for even browning.
- Don’t overcrowd the pan – keep pieces spaced for even crispness.
- Finish with a pinch of sea salt for a burst of flavor.
Pro Tips
Well, I always find that a brief resting period after the coating allows the flour to hydrate slightly, which gives that satisfying crunch. Also, keep a watchful eye on the oil temperature; too low and the coating will absorb excess oil, too high and it’ll burn before the chicken cooks through. Taking these small moments adds up to a dish that feels both familiar and special.
The essence of the dish:
A fun fact or historical angle:
Flavor or sensory focus:
You Must Know
- Season the flour thoroughly
- Rest the coated chicken
- Maintain steady oil temperature
Frequently Asked Questions
→ Can I use chicken breast instead of thighs?
Yes, but breast can dry out faster; consider brining it first.
→ What oil is best for frying?
A neutral oil with a high smoke point, like canola or peanut, works well.
→ Should I double‑coat the chicken?
A single coat is sufficient; double‑coating can become too thick.
→ How do I keep the crust crispy after cooking?
Place the chicken on a wire rack over a baking sheet to let excess oil drip away.
→ Can I bake this instead of fry?
Yes, bake at 425°F for 25‑30 minutes, spraying lightly with oil.
→ What sides pair best?
Coleslaw, mashed potatoes, or a simple green salad complement the richness.
Chef's Tips
For extra flavor, add a pinch of cayenne to the flour mix.,If the coating sticks, pat the chicken dry again before the second dip.,Use a splatter guard to keep the stovetop tidy.
Nutrition Facts
per serving
420
Calories
28g
Protein
24g
Carbs
22g
Fat
Taste Profile
Savory with a subtle sweet finish
Ingredient Substitutions
Don't have an ingredient? Try these alternatives
If using tofu, press well and adjust cooking time to achieve crispness.
Provides a lighter, crispier crust for gluten‑free diets.
Recipe Variations
Try these delicious twists on the original
Spicy Version
Add ½ tsp cayenne pepper and a dash of hot sauce to the buttermilk for a gentle kick.
Mediterranean Style
Mix oregano and lemon zest into the flour, then serve with a tzatziki drizzle.
Common Mistakes to Avoid
Learn from others' mistakes for perfect results
- Overcrowding the pan, which lowers oil temperature and makes crust soggy
- Skipping the rest period after coating, leading to a loose crust
- Using oil that’s too hot, causing burnt exterior before interior cooks
Meal Prep & Storage
Make Ahead Tips
You can marinate the chicken in the buttermilk mixture up to 24 hours ahead; store refrigerated and bring to room temperature before frying.
Leftover Ideas
Reheat gently in a skillet over medium heat, adding a splash of oil to revive the crunch.
Perfect Pairings
Serve this with...
Cooking Timeline
Prepare ingredients – pat chicken dry, whisk buttermilk, combine flour and spices.
Dip chicken in buttermilk, coat with flour mixture, let rest on a tray.
Heat oil and fry chicken batches until golden, turning once.
Drain on rack, drizzle with honey, and let rest briefly before serving.
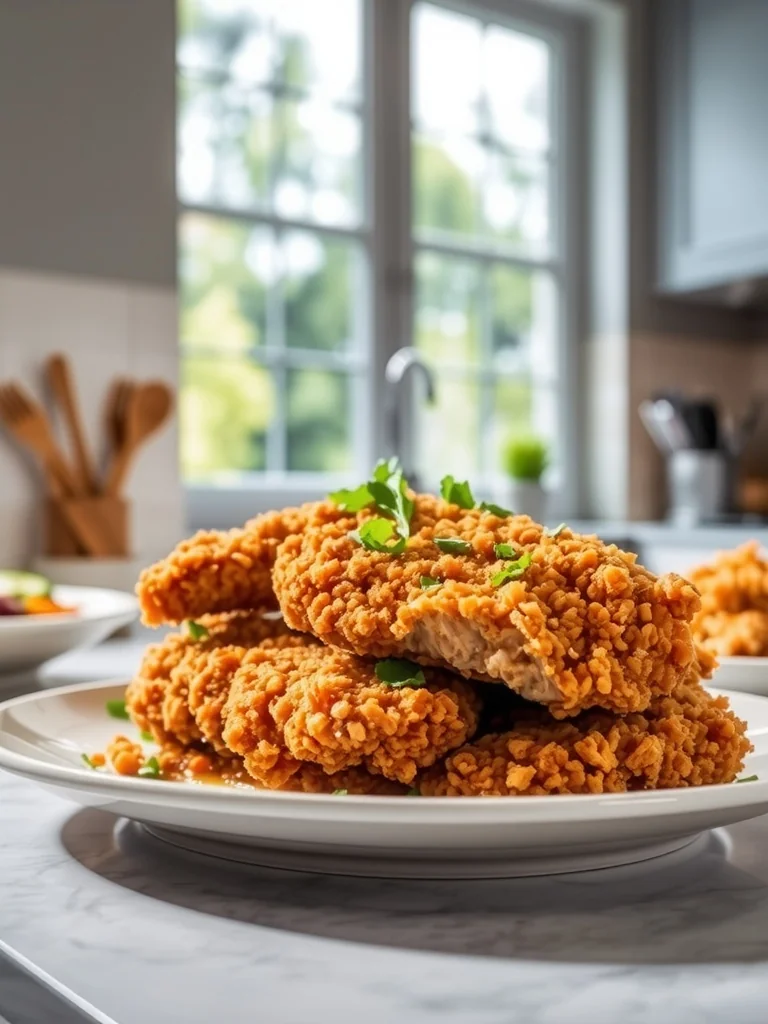
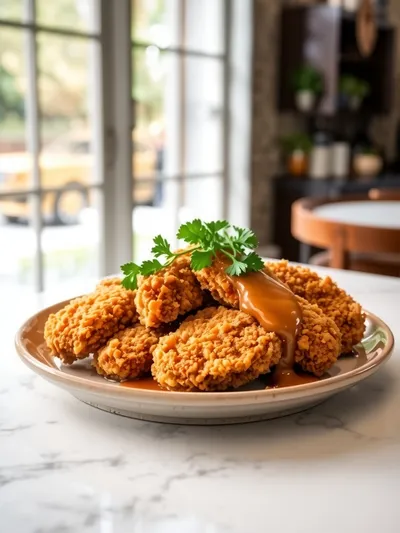
Chicken Fried Chicken Recipe – The Best Way
A comforting, golden‑brown chicken fried chicken that stays juicy inside, with a crisp coating that sings of herbs and a touch of spice. Perfect for a family dinner or a weekend gathering.
Timing
Prep Time
15 Minutes
Cook Time
25 Minutes
Total Time
40 Minutes
Recipe Details
Ingredients
Main Ingredients
- 01 4 skinless, boneless chicken thighs, cut into strips
- 02 1 cup buttermilk
- 03 2 tbsp fresh lemon juice
- 04 1 cup all‑purpose flour
- 05 1 tsp paprika
- 06 1 tsp garlic powder
- 07 1 tsp dried thyme
- 08 1/2 tsp salt
- 09 1/2 tsp black pepper
- 10 2 cups vegetable oil for frying
- 11 1 tbsp honey (optional, for drizzling)
Instructions
In a shallow bowl, whisk together the buttermilk and lemon juice; set aside.
In another bowl, combine flour, paprika, garlic powder, thyme, salt, and pepper; stir to blend.
Dip each chicken piece into the buttermilk, let excess drip, then coat thoroughly in the flour mixture.
Heat oil in a large skillet over medium‑high heat until it reaches 350°F; gently place coated chicken, frying 4‑5 minutes per side until golden and the internal temperature hits 165°F.
Transfer to a wire rack, drizzle with honey if desired, and let rest a couple of minutes before serving.
Notes & Tips
- 1 For extra flavor, add a pinch of cayenne to the flour mix.
- 2 If the coating sticks, pat the chicken dry again before the second dip.
- 3 Use a splatter guard to keep the stovetop tidy.
Tools You'll Need
-
Large skillet or deep fryer
-
Wire cooling rack
-
Measuring spoons
-
Mixing bowls
-
Tongs
-
Instant‑read thermometer
Must-Know Tips
- Don't overcrowd the pan, Cook in batches to keep oil temperature steady
- Let meat rest, Allows juices to redistribute
- Taste as you go, Adjust seasoning after the first coat
Professional Secrets
- Room temperature chicken, Ensures even cooking
- High heat for searing, Creates the perfect crust
- Drain on a rack, Captures all the flavor without soggy bits

Recipe by
Emily CarterEmily Carter is known for transforming classic chicken dishes into comforting baked creations. She specializes in oven-roasted chicken meals, savory c ...
Get Delicious Recipes Weekly
Join 25,000+ home cooks getting our best recipes straight to their inbox.
Free forever • No spam • Unsubscribe anytime