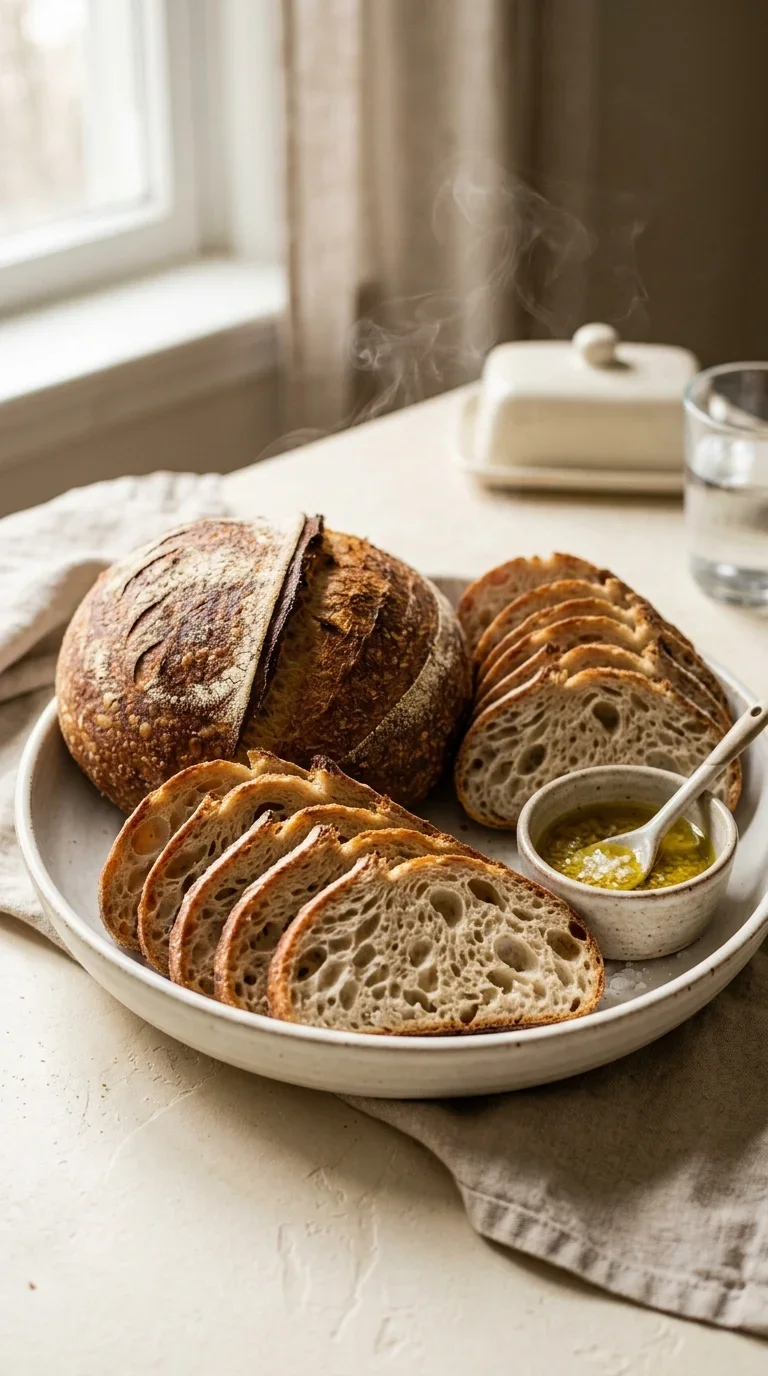
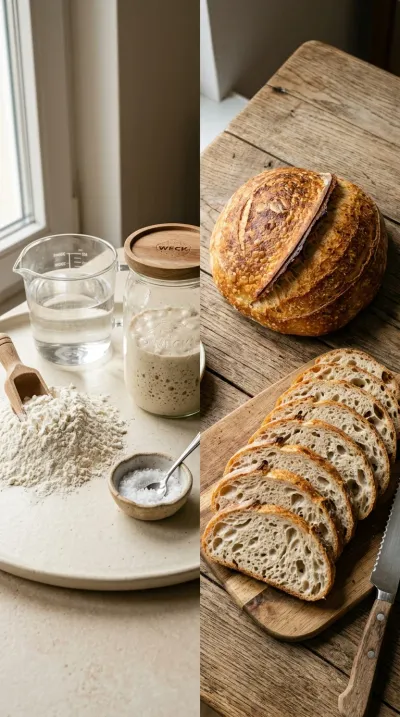
Sourdough is perhaps one of the oldest forms of leavened bread, dating back to ancient Egypt where it was discovered that wild yeast in the air could naturally ferment flour and water. Unlike modern commercial yeast, this beginner-friendly sourdough bread relies on a symbiotic colony of bacteria and yeast, creating a complex flavor profile and a texture that is easier for many to digest.
Throughout history, the sourdough starter was a prized family heirloom, often passed down through generations like a living piece of history. In the American West during the Gold Rush, miners famously carried their starters in pouches close to their bodies to keep the wild yeast warm in the freezing climate.
This traditional method of fermentation not only provides the characteristic tang but also strengthens the gluten structure of the dough. By allowing the wild yeast to work slowly, the bread develops a deeper nutritional value and a hearty, artisanal quality that has remained virtually unchanged for thousands of years.
Why You'll Love It
-
- Honestly, there's nothing quite like the smell of a fresh loaf filling the house; it just feels like a warm hug from the inside out.
-
- I mean, who doesn't love that golden, crusty exterior that gives way to a soft, chewy center? It's just pure comfort on a plate.
-
- Well, look, I've made this a hundred times and the process is just so grounding, especially for those of us who feel a bit intimidated by sourdough.
-
- It's just so rewarding to see those bubbles form and know you've created something artisanal right in your own little kitchen.
"I finally stopped being intimidated by my starter. This loaf came out perfectly golden and tastes just like the bakery!"
Essential Ingredient Guide
- 100g active sourdough starter (100% hydration): This is the heart of your bread, yeah. Make sure it's bubbly and happy before you start, or your loaf might just decide to take a nap instead of rising.
- 500g all‑purpose flour: I usually stick with this for a softer crumb, but you can use bread flour if you want a bit more chew. Just measure it carefully so the dough doesn't get too stiff.
- 350g water, lukewarm (about 82°F/28°C): The temperature is key here, honestly. You want it just warm enough to wake up the yeast without accidentally scorching the poor thing.
- 10g sea salt (about 2 teaspoons): Don't skip this, ugh, or the bread will taste flat. It brings out all those lovely fermented notes and keeps the crust tasting seasoned.
- Whole wheat flour: If you're feeling adventurous, replacing 25% of the all-purpose flour adds such a lovely nuttiness. It makes the bread feel a bit more rustic, like something from a country market.
- Sunflower and pumpkin seeds: Adding a couple of tablespoons of these during the fold gives a wonderful little crunch. It's a simple way to make the loaf feel a bit more special for guests.
Complete Cooking Process
-
Getting Ready:
Start by making sure your 100g active sourdough starter (100% hydration) is active and your 350g water, lukewarm (about 82°F/28°C) is just right. It's all about giving those ingredients a gentle start.
-
Deepening the Flavor:
The magic happens during that bulk ferment for 3 to 4 hours. That's when the wild yeast does its thing, creating those complex, tangy flavors we all love.
-
Perfecting the Texture:
Those fold and rest cycles are where the strength comes from. It turns a shaggy mess into a smooth, elastic dough that'll hold its shape in the oven.
-
The Final Touch:
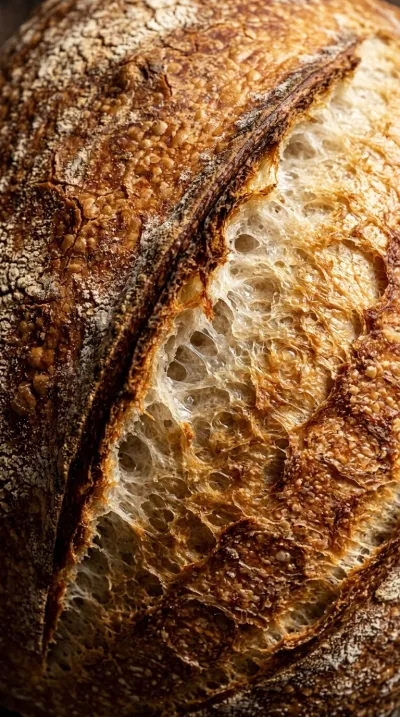
Scoring the top with a sharp blade is so satisfying, wow. It tells the bread exactly where to expand so it doesn't just burst open randomly.
-
The Big Wait:
I know it's hard, but you've got to let it cool for at least an hour. Slicing too early can make the inside feel gummy, and we want that perfect crumb.
-
If your starter is overly liquid, reduce the water by 10-15% to get a firmer feel.
-
A bench scraper is a lifesaver for keeping the dough tidy during shaping.
-
Spritz the inside of your Dutch oven with water for an even clearer, crispier crust.
-
Listen for that hollow sound when tapping the bottom to know it's truly done.
Pro Tips
Just take your time and trust the process; your kitchen is going to smell amazing!
 Healthy & Vegetarian
Baked Salmon in Foil Packs with Asparagus
A simple, healthy one‑pan dinner: salmon and asparagus baked together in buttery foil.
Better For You Treats
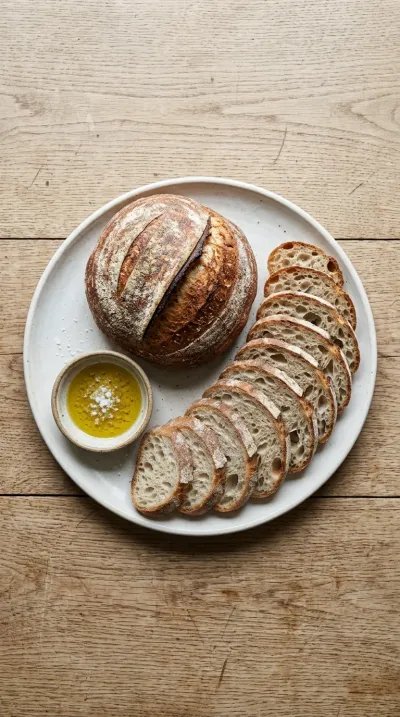
Sourdough is just gentler on the tummy than store-bought bread, don't you think? With just 500g all‑purpose flour and a bit of salt and water, it's a simple, honest loaf. You can even swap in some whole wheat or rye for a lower glycemic index if you're watching those things.
Ways to Make it Your Own
I love playing around with this one. You could replace 25% of the flour with whole wheat for a nutty vibe, or toss in 2 tablespoons of sunflower and pumpkin seeds for a bit of a crunch. It's your loaf, so feel free to make it your own!
Serving Suggestions
Oh, I just love a slice with a bit of goat cheese and honey—so sweet and savory. Or, if you're feeling fancy, try a classic croque monsieur with turkey ham and Gruyère. It's also just wonderful toasted on a charcuterie board with some olives.
Frequently Asked Questions
→ What if my dough feels too sticky to handle?
Oops, that happens! Just use a bit more flour on your hands or a bench scraper, and remember that sourdough can be a little tacky until it's baked.
→ Do I really have to wait an hour before slicing?
I know it's torture, believe me, but yeah. The bread is actually still cooking inside while it cools, so waiting ensures the texture is just right.
→ Can I bake this without a Dutch oven?
You can, but the lid traps the steam which gives you that bakery-style crust. If you don't have one, a baking stone and a tray of water in the oven can help, but it's not quite the same.
Nutrition Facts
per serving
180
Calories
6g
Protein
36g
Carbs
1g
Fat
Taste Profile
A classic balanced sourdough with a gentle tang and salty crust.
Ingredient Substitutions
Don't have an ingredient? Try these alternatives
Provides more protein for a chewier texture and better rise.
Use slightly more as kosher salt is less dense.
The goal is to trap steam for the first 20 minutes.
Recipe Variations
Try these delicious twists on the original
Whole Wheat Sourdough Bread
For a nuttier taste and more fiber, replace 25% of the all-purpose flour with whole wheat flour. Just keep in mind the dough might need a little more time to rise.
Seeded Sourdough Bread
Stir in 2 tablespoons of sunflower and pumpkin seeds during the final fold. Let the shaped loaf rest an extra 15 minutes so the seeds settle in nicely.
Common Mistakes to Avoid
Learn from others' mistakes for perfect results
- Rushing the bulk ferment in a cold kitchen, leading to a flat loaf.
- Cutting into the bread while it's still hot, which can make the crumb gummy.
- Forgetting to preheat the Dutch oven, resulting in a lack of oven spring.
Meal Prep & Storage
Make Ahead Tips
The dough can be shaped and then placed in the fridge overnight for a 'cold proof', which often deepens the sourdough flavor.
Leftover Ideas
Store in a paper bag for 3 days. To revive, spray with water and pop in a 300°F oven for 10 minutes.
Perfect Pairings
Serve this with...
Cooking Timeline
Mix starter and water; let sit
Add flour and salt; autolyse rest
Perform three cycles of stretch and fold
Bulk fermentation at room temperature
Shape, final rest, and bake
Beginner-Friendly Sourdough Bread
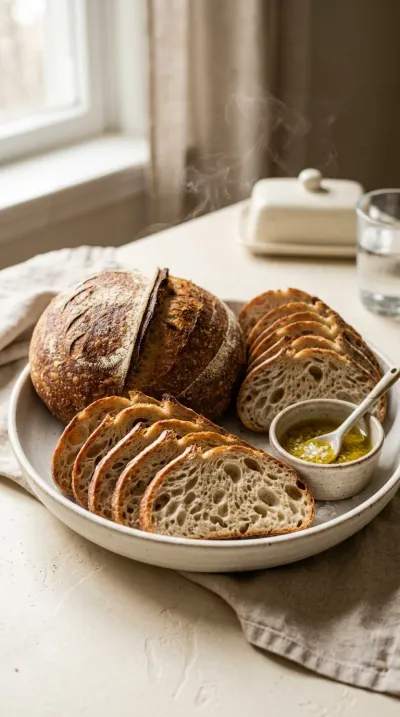
There is nothing quite like the scent of a warm, golden loaf coming out of the oven. This beginner-friendly sourdough bread brings that artisanal, crusty magic into your home kitchen with a soft, chewy center that just feels like a hug.
Timing
Prep Time
15 Minutes
Cook Time
40 Minutes
Total Time
55 Minutes
Recipe Details
Ingredients
Main Ingredients
-
01
100g active sourdough starter (100% hydration)
-
02
350g water, lukewarm (about 82°F/28°C)
-
03
500g all-purpose flour (you can use bread flour for a higher protein option)
-
04
10g sea salt (about 2 teaspoons)
Instructions
Start by gently stirring your 100g active sourdough starter into the 350g water, lukewarm (about 82°F/28°C), in a large bowl. Just stir until it's all dispersed into a loose, bubbly sort of dough. Cover it with a kitchen towel or plastic wrap and let it just sit there for 30 minutes; it's lovely to watch it start to bubble and expand.
Now, stir in your 500g all-purpose flour (you can use bread flour for a higher protein option) and 10g sea salt (about 2 teaspoons). Using a dough scraper, just fold everything together until it looks like a shaggy dough. Let it rest for another 30 minutes—this is the autolyse part, which honestly just helps the flour hydrate and gets the gluten going on its own.
Time to get your hands in there. Fold the dough over itself right in the bowl for about 5-6 minutes, then give it a 5-minute rest. You'll want to repeat this fold-and-rest cycle two more times—three cycles total. Well, look at that, the dough should feel smooth and elastic, though still a little tacky.
Cover your bowl back up and let the dough bulk ferment for 3 to 4 hours at room temperature (about 70°F/21°C). It'll rise up and get a nice, bubbly surface. If your kitchen is a bit warm, it might happen faster; if it's chilly, it could take up to 5 hours. Just be patient with it.
Move your dough onto a lightly floured surface. Shape it into a round loaf by pulling the edges under to create some surface tension—you want a tight little ball. Let it rest, loosely covered, for 30 minutes just to let the gluten relax before the oven.
Preheat your oven to 475°F (246°C) with your Dutch oven inside. Once it's hot, carefully take the pot out, line it with parchment paper, and slide your dough in. Oops, be careful with that heat! Score the top with a sharp blade or knife so the bread knows where to expand.
Put the lid on and bake for 20 minutes. Then, take the lid off to let that crust get really deep golden brown for another 15 to 20 minutes. You'll know it's done when you tap the bottom and it sounds hollow—that's the best part.
Transfer your loaf to a wire rack. Now comes the hard part: let it cool completely for at least 1 hour. I know it's tempting, but the crumb needs to set to get the flavor just right.
Notes & Tips
-
1
The autolyse stage is key for a better crumb without too much hard work.
-
2
Using bread flour can give you a bit more height if you prefer a taller loaf.
-
3
The hollow sound when tapping the bottom is the most reliable way to check doneness.

Tools You'll Need
-
Large mixing bowl for combining ingredients
-
Dutch oven with lid for trapping steam and creating crust
-
Dough scraper or spatula for folding and cleaning
-
Kitchen towel or light plastic wrap for covering
-
Thermometer or instant-read probe for checking water temperature
-
Oven mitts for handling the hot pot
-
Parchment paper to prevent sticking
-
Measuring cups and spoons for accuracy
Must-Know Tips
-
Water adjustment, if your starter is too liquid, reduce the water by 10-15% to keep the dough firm.
-
Shaping aid, use a bench scraper to keep your loaf tidy and stop the dough from sticking to your hands.
-
Steam boost, spritz the inside of the Dutch oven with water before covering to get an even clearer crust.
Professional Secrets
-
The 'stretch and fold' method replaces heavy kneading to build strength gently.
-
Creating surface tension during shaping is what gives the bread its professional height.
-
The 1-hour cool down isn't just for safety; it's essential for the internal structure to finalize.
What readers are saying
Community reviews from home cooks like you
This exceeded my expectations. I really liked how the 100g active sourdough starter (100% hydration) and 350g water, lukewarm (about 82°F/28°C) came together. Great addition to my recipe rotation.
I was surprised how good this turned out. I really liked how the 100g active sourdough starter (100% hydration) and 350g water, lukewarm (about 82°F/28°C) came together. I added a bit more seasoning next time. Thanks for sharing this one!
So easy and delicious. I really liked how the 100g active sourdough starter (100% hydration) and 350g water, lukewarm (about 82°F/28°C) came together. I found it a bit sweet for my taste. Will be making this regularly.
So easy and delicious. I really liked how the 100g active sourdough starter (100% hydration) and 350g water, lukewarm (about 82°F/28°C) came together. I swapped one ingredient and it still worked. Great addition to my recipe rotation.
So easy and delicious. I really liked how the 100g active sourdough starter (100% hydration) and 350g water, lukewarm (about 82°F/28°C) came together. Next time I'll double the sauce. Great addition to my recipe rotation.
I wanted to love this dish, but it didn't quite work for me. I added a bit more seasoning next time. I think with some tweaks it could be really good.
So easy and delicious. I really liked how the 100g active sourdough starter (100% hydration) and 350g water, lukewarm (about 82°F/28°C) came together. Perfect as written.
The flavors were spot on. I really liked how the 100g active sourdough starter (100% hydration) and 350g water, lukewarm (about 82°F/28°C) came together. Saving this for later.
This exceeded my expectations. I really liked how the 100g active sourdough starter (100% hydration) and 350g water, lukewarm (about 82°F/28°C) came together. The texture was a touch off, but the flavor saved it. Already shared it with a friend.
The flavors were spot on. I really liked how the 100g active sourdough starter (100% hydration) and 350g water, lukewarm (about 82°F/28°C) came together. Great addition to my recipe rotation.

Recipe by
Sophia BennettSophia Bennett represents the artistic heart of sweet baking with her elegant cakes, delicate pastries, and celebration desserts. She enjoys crafting ...
Get Delicious Recipes Weekly
Join 25,000+ home cooks getting our best recipes straight to their inbox.
Free forever • No spam • Unsubscribe anytime