Why You'll Love It
- - Easy to shape, no fancy tools needed
- - Rich, buttery crust that flakes perfectly
- - Sweet apple filling with just the right spice
- - Perfect for a quick snack or a dessert centerpiece
"These hand pies are pure nostalgia, each bite feels like a warm memory."
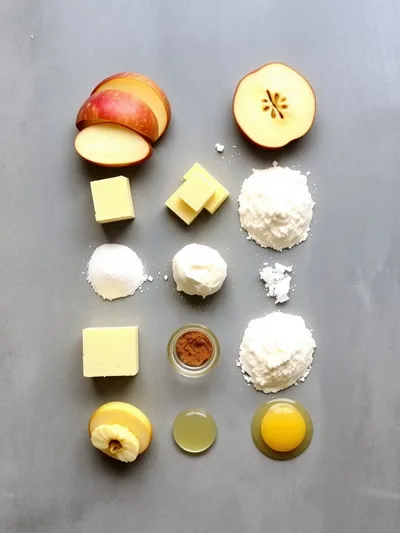
Essential Ingredient Guide
- All‑purpose flour: Choose unbleached for a tender crumb; sift to avoid lumps.
- Cold butter: Cube and keep chilled; it creates flaky layers when baked.
- Granny Smith apples: Tart apples hold their shape and balance the sweet glaze.
- Cinnamon and nutmeg: Warm spices awaken the aroma; add just before the filling simmers.
- Lemon juice: A splash brightens the apples and prevents browning.
- Brown sugar: Adds depth and a caramel‑kissed finish to the filling.
Complete Cooking Process
-
Ingredient Readiness:
Measure flour, chill butter, and peel and slice apples before any heat touches the kitchen.
-
Flavor Development:
Sauté apples with butter, sugar, and spices until they soften and release their fragrant perfume.
-
Texture Control:
Handle the dough gently; over‑mixing seals in steam for a flaky crust.
-
Finishing Touches:
Brush each pie with egg wash, sprinkle a pinch of sugar, and bake until golden.
-
Serving Timing:
Let pies rest a few minutes; the filling settles, making each bite perfectly juicy.
- Keep all butter and water ice‑cold for maximum flakiness
- Use a fork to crimp edges for a rustic seal
- Brush with melted butter for extra shine
- Serve warm with a scoop of vanilla ice cream
Pro Tips
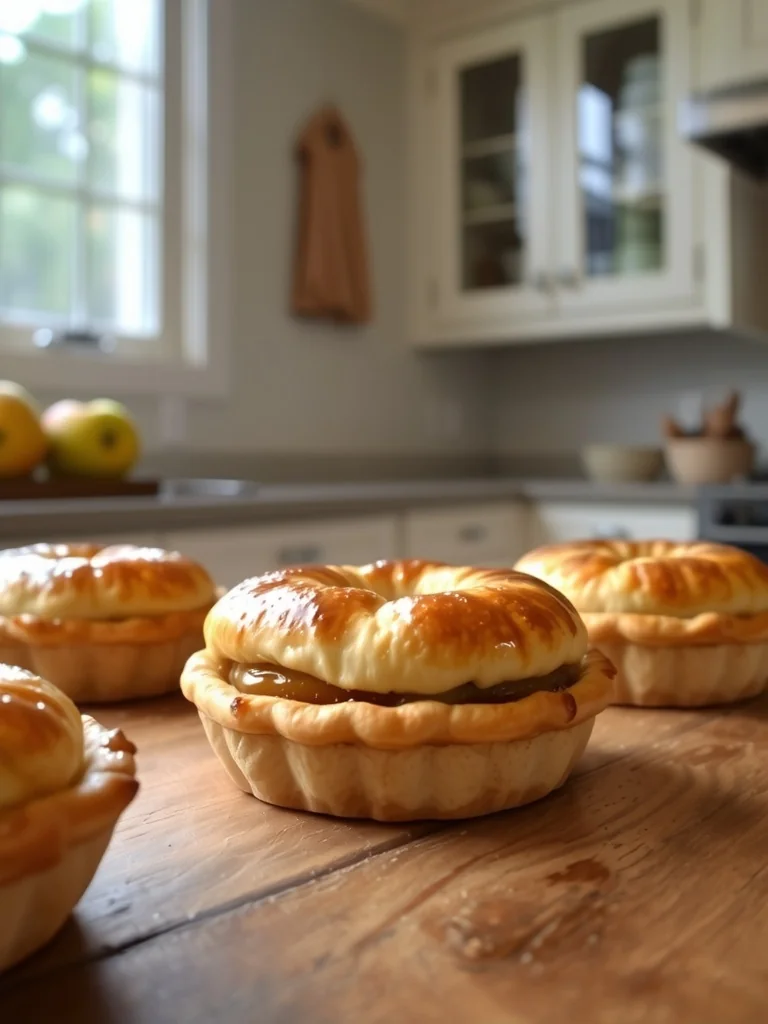
Sometimes, the kitchen feels a little louder when the pies are in the oven, and that’s okay—let the aromas do the talking. You’ll notice the crust turning a deep amber, a sign that the butter has caramelized just right. Once out, the scent of baked apple mingles with the sweet butter, inviting anyone nearby to the table.
The essence of the dish:
A fun fact or historical angle:
Flavor or sensory focus:
You Must Know
- Work quickly to keep dough cold
- Don’t over‑fill; a little gap prevents leaks
- Seal well to keep steam inside
Frequently Asked Questions
→ Can I freeze the hand pies before baking?
Yes, freeze assembled pies on a tray, then transfer to a freezer bag; bake from frozen, adding a few extra minutes.
→ What type of apples work best?
A mix of Granny Smith for tartness and Honeycrisp for sweetness gives the best texture and flavor.
→ Can I make a gluten‑free version?
Swap all‑purpose flour for a 1‑to‑1 gluten‑free blend; the texture remains pleasantly tender.
→ Do I need an egg wash?
Egg wash adds shine and helps the sugar glaze adhere, but you can use milk or melted butter as a substitute.
→ How long do they keep?
Stored in an airtight container at room temperature for up to two days, or refrigerate up to a week.
→ Can I add a caramel drizzle?
Absolutely—drizzle warm caramel sauce over the pies just before serving for extra richness.
Chef's Tips
If the dough feels dry, add a splash more ice water, one tablespoon at a time.,Avoid over‑filling; excess juice can seep out during baking.,For a gluten‑free crust, use a blend like King Arthur Measure for Measure.
Nutrition Facts
per serving
310
Calories
3g
Protein
38g
Carbs
15g
Fat
Taste Profile
Warm, sweet‑spiced comfort
Ingredient Substitutions
Don't have an ingredient? Try these alternatives
Will give a nuttier flavor; may require a bit more water.
Will still produce flakiness, but flavor slightly less rich.
Recipe Variations
Try these delicious twists on the original
Spicy Version
Add 1/4 tsp cayenne pepper and a splash of apple cider vinegar for a subtle kick.
Mediterranean Style
Incorporate crumbled feta and a pinch of rosemary into the filling for a savory twist.
Common Mistakes to Avoid
Learn from others' mistakes for perfect results
- Over‑mixing the dough, which makes it tough.
- Filling the pies too heavily, causing leaks.
- Baking at too low a temperature, resulting in soggy crust.
Meal Prep & Storage
Make Ahead Tips
Prepare the dough and filling a day ahead; keep them refrigerated separately and assemble just before baking for fresh warmth.
Leftover Ideas
Reheat gently in a 300°F oven for 10 minutes; the crust revives its crispness.
Perfect Pairings
Serve this with...
Cooking Timeline
Gather and measure all ingredients; chill butter.
Prepare dough, wrap, and refrigerate.
Cook apple filling until fragrant and softened.
Roll dough, fill, shape hand pies, and bake.
Cool slightly, then serve warm with desired garnish.
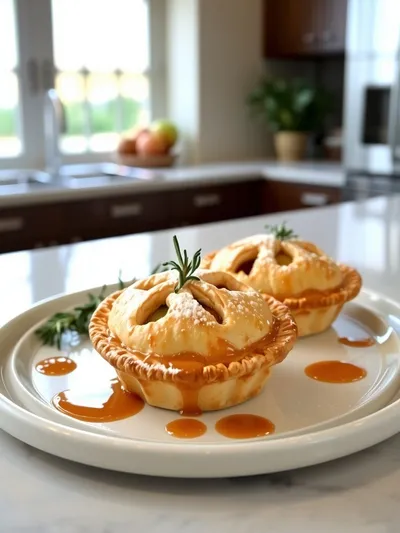
Apple Hand Pies – Easy Homemade Recipe
Flaky, buttery apple hand pies that feel like a warm hug on a chilly afternoon—sweet apples, golden crust, perfect bite-sized comfort.
Timing
Prep Time
20 Minutes
Cook Time
25 Minutes
Total Time
45 Minutes
Recipe Details
Ingredients
For the Crust
- 01 2 1/2 cups all‑purpose flour
- 02 1 tsp salt
- 03 1 cup unsalted cold butter, cubed
- 04 6‑8 tbsp ice‑cold water
For the Filling
- 01 4 large Granny Smith apples, peeled and diced
- 02 1/4 cup brown sugar
- 03 2 tbsp granulated sugar
- 04 1 tsp ground cinnamon
- 05 1/4 tsp ground nutmeg
- 06 1 tbsp lemon juice
- 07 2 tbsp unsalted butter
- 08 1 egg, beaten (for egg wash)
- 09 1 tbsp granulated sugar (for sprinkling)
Instructions
In a bowl combine flour and salt. Add cold butter cubes and rub together with fingertips until the mixture resembles coarse crumbs.
Drizzle ice water over the flour mixture, stirring gently until the dough just comes together. Divide into two disks, wrap, and chill for 30 minutes.
While dough chills, melt butter in a skillet over medium heat. Add diced apples, sugars, cinnamon, nutmeg, and lemon juice; sauté until softened and slightly caramelized, about 8 minutes.
Roll out one dough disk on a lightly floured surface to 1/8‑inch thickness. Cut circles about 4‑inches wide; place a spoonful of apple filling in the center of each.
Brush edges with water, fold over to create a half‑moon, and crimp with a fork. Repeat with remaining dough and filling.
Brush each pie with beaten egg, sprinkle a little sugar, and place on a parchment‑lined baking sheet.
Bake at 375°F (190°C) for 20‑25 minutes, until the crust is golden brown and the apples are bubbling.
Let cool slightly. Serve warm, perhaps with a dollop of vanilla ice cream or a drizzle of caramel sauce.
Notes & Tips
- 1 If the dough feels dry, add a splash more ice water, one tablespoon at a time.
- 2 Avoid over‑filling; excess juice can seep out during baking.
- 3 For a gluten‑free crust, use a blend like King Arthur Measure for Measure.
Tools You'll Need
-
Rolling pin
-
9‑inch pie dish or baking sheet
-
Sharp knife or pastry cutter
-
Mixing bowls
-
Baking parchment
-
Pastry brush
Must-Know Tips
- Don't overwork the dough; it keeps the crust tender.
- Keep butter chilled for steam pockets that create flakiness.
- Brush with egg wash for an appealing golden finish.
Professional Secrets
- Use ice‑cold water to prevent butter from melting early.
- Chill the assembled pies for 10 minutes before baking for better shape retention.
- Rotate the baking sheet halfway through for even browning.

Recipe by
Sophia BennettSophia Bennett represents the artistic heart of sweet baking with her elegant cakes, delicate pastries, and celebration desserts. She enjoys crafting ...
Get Delicious Recipes Weekly
Join 25,000+ home cooks getting our best recipes straight to their inbox.
Free forever • No spam • Unsubscribe anytime